Taigen/Torro tanks will require some minor rewiring that is not applicable to the Heng Long tank. Please see the Heng Long section for instructions on rewiring this manufacturer.
To get started, you will need access to the wiring of the airsoft unit, airsoft switch, rotation unit (if applicable), and elevation unit.
- Open tank and remove upper hull or upper casemate from the lower hull. Disconnect wires from the upper hull or casemate that connect to the tank control board if this had not already been done, i.e. 8 PIN wire.
- For a turret based tank:
- Unscrew turret from turret ring.
- Unscrew turret lower plate from the upper half of the turret.
In contrast to how Heng Long and Clark setup the 8 PIN for the upper hull, the Taigen/Torro airsoft motor and elevation motor share a common power source. The most common configuration from Taigen/Torro is a 3 PIN wire (red, black, black) connected to the 8 pin board. This needs to be corrected to by splitting the shared power wire into a dedicated wire for power to both the elevation motor and recoil motor.
Rewiring to Split Shared Power Source
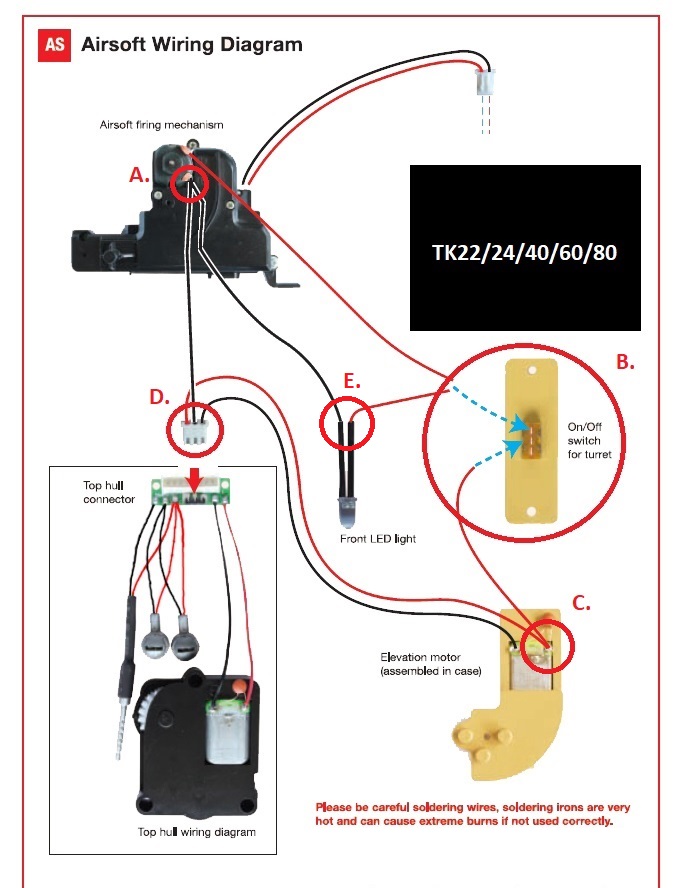
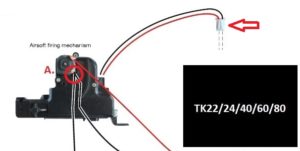
- Locate switch (reference section B) and cut the wires from the switch. No wires will remain connected to this switch when done.
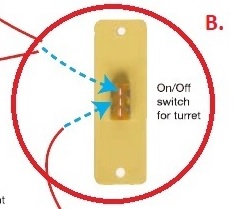
- Please note this will disconnect the on/off switch for the airsoft motor. Removal of the switch will simplify the rewiring and installation process. The switch will thus no longer function.
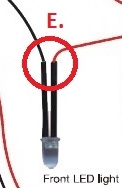
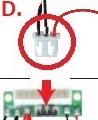
- Please note the LED in the mantlet or upper casemate will no longer light up when firing the airsoft unit. Removal of the LED will simplify the rewiring and installation process.
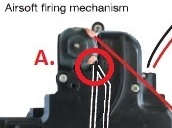
- Locate LED in mantlet or upper casemate, follow the black wire and cut only this black wire connected to the airsoft unit (reference section A).
- Cutting the wires to the LED in mantlet or upper casemate (reference section E) is highly recommended for not only wire management, but loose wires can get tangled up in gears and there is risk of a short that can damage the TK board.
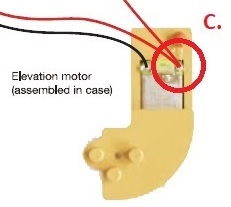
- Cut the loose red wire at the elevation motor (reference section C) that was connected to the switch per removal in step 1 (reference section B), as this wire is no longer needed.
- At the 3 PIN wire:
- Disconnect the two black wires (red wire being PIN 1, PIN 2 and PIN 3 wires) with a wire removal tool or thumbtack, as they will need to trade places. If using a thumbtack, from the top of the metal crimp visible in the rectangular opening. At about a 45 degree angle upwards, push into the crimp to release the clip.
- Move the outer black wire to the middle, and the middle black wire to the outer position.
Soldering the two wires to the 8 PIN board is an alternative option if you are unable to remove the wires from the plug. Please be careful if soldering.
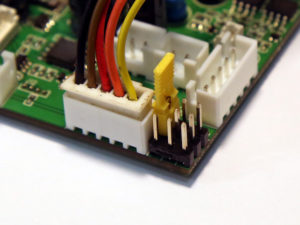
- Solder or splice the loose red wire from the airsoft motor, previously connected to the switch (reference section B) to PIN 3 on the 8 PIN board. PIN 3 is a shared power source for the MG LED, headlight LED, and airsoft motor.
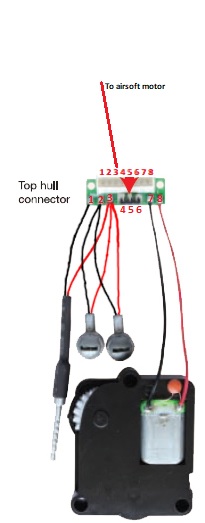
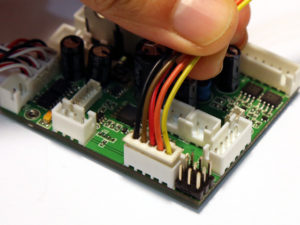
- Reconnect the 3 PIN flip flopped as to how it was originally installed for proper pinout. Note the rectangular openings that were previously facing outwards, will be facing inwards and the plug clips will be facing outwards instead.
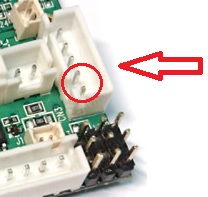
- Connect the 2 pin microswitch from the airsoft unit to the bottom 2 PINs of the 5 PIN CN3 of the TK board.
 Airsoft unit microswitch
 TK board CN3
Configuring TK Board for Airsoft Mode
By default, the Clark is setup for IR battling and needs a minor configuration change to set it in airsoft mode.
- Ensure the TK board is powered OFF before proceeding
- Plug IR configuration line into CN2.
- Place the jumper included with the IR configuration line into J2.
- Power on the TK board.
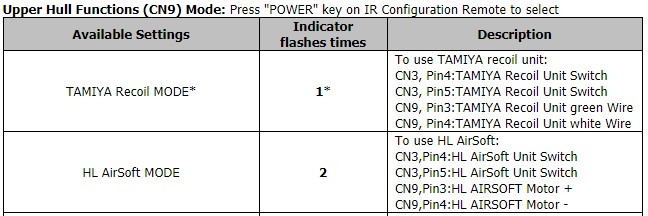
- Using the IR Configuration Remote, press the Power button once. The LED on the IR configuration line flashes to indicate the new setting value with each press of the IR Configuration Remote. Repeat if needed, until the LED flashes 2 times. A NEW TK board will be setup for Tamiya recoil mode by default, so 1 press of the Power button should be needed.
- When done, turn power off, remove jumper on J2. Next power on, the TK board will run with the new settings.